  |
|
Showing posts with label field trip. Show all posts
Showing posts with label field trip. Show all posts
Oxalis tuberosa - Oca
Planting a tree
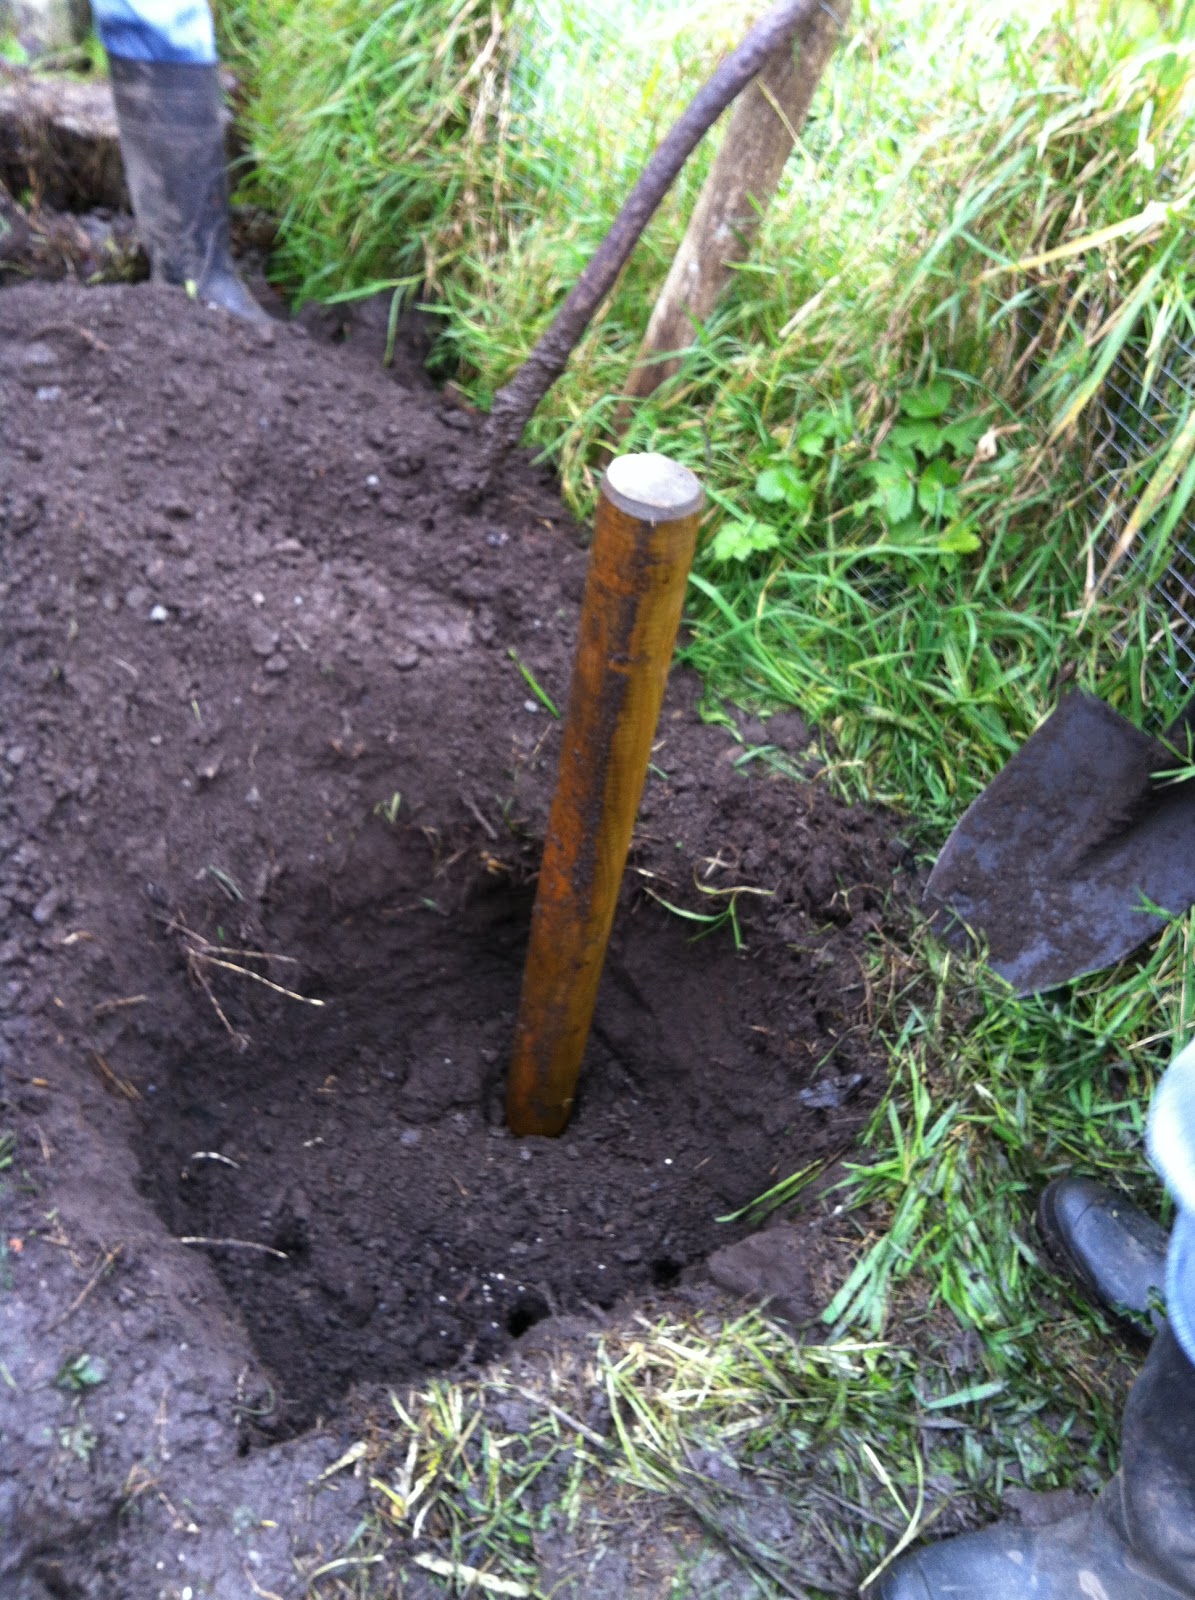
To plant a tree we need to dig a hole three times the size of the pot of the tree.
Once the hole is digged we will untighten the roots of the tree so they do not go circular and they can grow properly.
We will put some water into the hole to see if it drains. If it does we put some compost on the bottom, if it does not drain we will place some pebbles or sand and then the compost.
We lay the roots on the hole and cover with soil avoiding to leave air in the middle.
We press the soil on the top and put some more compost over it.

|
 |
 |
 |
 |
 |
We can stake the tree to help it grow straight even if there are hard winds. We will place the stake on the side of the dominant wind, at a distance of 20cm of the tree and we will tie the stake to the tree with rubber cords to allow the tree to have flexibility when it gets the wind.
Never stake a tree longer than two years. Its root should develop properly to give enough strength to the tree to hold by its own roots.
Never stake a tree longer than two years. Its root should develop properly to give enough strength to the tree to hold by its own roots.
The tree we planted is a cherry tree.

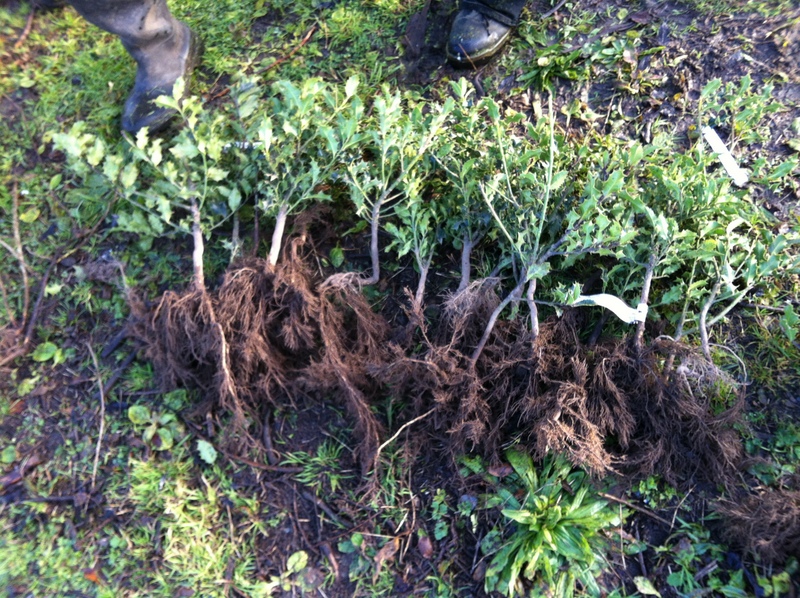
Planting cuttings
When we take cutting from a plant we should plant them in the next half an hour. We can put them in water till we work with them.
Before planting them we can deep the cutting into rooting compound first.
We will have to create the proper mix of soil to put into the pot. It should contain:
The cuttings should be in the pot at least for one year and then we can move it to another pot where they should be another year. After two years they can be moved to their final place.


Before planting them we can deep the cutting into rooting compound first.
We will have to create the proper mix of soil to put into the pot. It should contain:
- Soil
- Sand
- Compost
- Vermiculate or perlite
The cuttings should be in the pot at least for one year and then we can move it to another pot where they should be another year. After two years they can be moved to their final place.


Pruning a tree
 |
| Scar in the bark due to wrong pruning |
When we prune a tree we have to be careful not to make scars on the bark. If the pruning of a branch is done to close to the bark, it will leave a scar in the bark and the inner part of the trunk will be exposed to air, therefore to fungi and roteness.
When pruning a branch we should always leave at least 2-3 cm of the branch out of the trunk, so when the bark reabsorbes it, does not make any scar in the tree.
 |
| Proper pruning leaving 2-3cm of distance to the trunk |
 |
| How it should look after pruning |
 |
| Scar due to a too tight staking of the tree |
Other scars in the tree may be done by a bad staking. It we stake the tree too tight or with a hard material that is not rubber, the wind will make the string rub the bark and cause a scar like the one shown in the photo.
School hedge
We have planted a hedge to give some shelter to the school orchard.
 We used:
That is a total of 62 plants that will allow as to have a double row of 31 plants each.
AUGER HOLES
SQUARE HOLES
- 6 rosa rugosa
- 6 berberis purpurea
- 7 cotoneaster bulatus
- 21 privet legostrum
- 22 Common Holly
That is a total of 62 plants that will allow as to have a double row of 31 plants each.
The lenght of the hedge is 6meters+15 meters that makes a total of 19 meters.
19/31=0.6m=2 feet
The distance between the plants will be of 2 feet in each of the two rows with a gap of 1 foot in between both rows.
With a string and some pegs we marked the position of each of the plants on each of the two rows.
We divided into three groups, one will dig square holes, the other will do round holes with the auger and the last will dig a trench.
TRENCH WORK
TRENCH WORK
 |
 |
|
 |
 |
 |
AUGER HOLES
 |
 |
|
 |
 |
 |
SQUARE HOLES
 |
 |
 |
 |
Identifying nearby plant
We collected branches from trees near our homes to identify them in the classroom

 |
| Silver maple |
 |
| Pine tree |

 |
| Ash |
Compost
Here are some tips on how to create a good organic compost:
Compost ingredients

Compost ingredients
1. 'Greens' or nitrogen rich ingredients
2. Other green materials
To make good compost you need a more or less equal amount of 'greens' and 'browns' by volume. You can also include small amounts of the 'other ingredients' listed above.
- Urine (diluted with water 20:1)
- Comfrey leaves
- Nettles
- Grass cuttings
2. Other green materials
- Raw vegetable peelings from your kitchen
- Tea bags and leaves, coffee grounds
- Young green weed growth - avoid weeds with seeds
- Soft green prunings
- Animal manure from herbivores eg cows and horses
- Poultry manure and bedding
- Cardboard eg. cereal packets and egg boxes
- Waste paper and junk mail, including shredded confidential waste
- Cardboard tubes
- Glossy magazines - although it is better for the environment to pass them on to your local doctors� or dentists' surgery or send them for recycling
- Newspaper - although it is better for the environment to send your newspapers for recycling
- Bedding from vegetarian pets eg rabbits, guinea pigs - hay, straw, shredded paper, wood shavings
- Tough hedge clippings
- Woody prunings
- Old bedding plants
- Bracken
- Sawdust
- Wood shavings
- Fallen leaves can be composted but the best use of them is to make leafmould
- Wood ash, in moderation
- Hair, nail clippings
- Egg shells (crushed)
- Natural fibres eg. 100% wool or cotton
- Meat
- Fish
- Cooked food
- Coal & coke ash
- Cat litter
- Dog faeces
- Disposable nappies
How do I make my compost?
You can make compost simply by adding compostable items to a compost heap when you feel like it. It will all compost eventually but may take a long time and if the mix is unbalanced, may not produce a very pleasant end product. With a little extra attention you could improve things dramatically.
An ideal mix
To make good compost you need a more or less equal amount of 'greens' and 'browns' by volume. You can also include small amounts of the 'other ingredients' listed above.
How to manage our compost
- Gather enough material to fill your compost container at one go. Some of this may have been stored in a cool heap and have started to rot slightly. Make sure you have a mixture of soft and tough materials.
- Chop up tough items using shears, a sharp spade (lay items out on soil or grass to avoid jarring) or a shredder.
- Mix ingredients together as much as possible before adding to the container. In particular, mix items, such as grass mowings and any shredded paper, which tend to settle and exclude air, with more open items that tend to dry out. Fill the container as above, watering as you go.
- Give the heap a good mix within a few days, the heap is likely to get hot to the touch. When it begins to cool down, or a week or two later, turn the heap. Remove everything from the container or lift the container off and mix it all up, trying to get the outside to the inside. Add water if it is dry, or dry material if it is soggy. Replace in the bin.
- The heap may well heat up again; the new supply of air you have mixed in allows the fast acting aerobic microbes, ie those that need oxygen, to continue with their work. Step 4 can be repeated several more times if you have the energy, but the heating will be less and less. When it no longer heats up again, leave it undisturbed to finish composting.
In our school garden we turned the compost to give it some air.

A link to know more about compost
Plants for a school garden - educational space
Field trip to Deelish Garden Center
|
Plants suitable for challenging environments (wind, extreme temperatue changes)
Field trip to Deelish Garden Center
|
Some ideas for plants for special places
Plants for window boxes - hanging baskets suitable for a shop front display
Field trip to Deelish Garden Center
|
Some ideas for plants for special places
Plants for a shelterbelt enclosing a big site
Field trip to Deelish Garden Center
|
Helianthus tuberosus - Jerusalem artichokes
  |
|


Preparing the beds for the winter time
 |
| School garden beds after being prepared |
- Clear the bed
- Take away ant put into the compost all the dead plants and weeds
- Modify the pH with lime if the bed is too acid with sulfur or wood chips if it is too alkaline
- Cover with a net or plastic
- Hold the cover so it doesn't blow with the wind
Comfrey

Comfrey (also comphrey) is an important herb in organic gardening. It is used as a fertilizer and as an herbal medicine.
Comfrey is a particularly valuable source of fertility to the organic gardener. It is very deep rooted and acts as a dynamic accumulator, mining a host of nutrients from the soil. These are then made available through its fast-growing leaves (up to 4-5 pounds per plant per cut) which, lacking fibre, quickly break down to a thick black liquid. There is also no risk of nitrogen robbery when comfrey is dug into the soil as the C:N ratio of the leaves is lower than that of well-rotted compost. Comfrey is an excellent source of potassium, an essential plant nutrient needed for flower, seed and fruit production. Its leaves contain 2-3 times more potassium than farmyard manure, mined from deep in the subsoil, tapping into reserves that would not normally be available to plants.
There are various ways in which comfrey can be used as a fertilier. These include:
- Comfrey as a compost activator - include comfrey in the compost heap to add nitrogen and help to heat the heap. Comfrey should not be added in quantity as it will quickly break down into a dark sludgy liquid that needs to be balanced with more fibrous, carbon-rich material.
- Comfrey liquid fertilizer - can be produced by either rotting leaves down in rainwater for 4–5 weeks to produce a ready-to-use 'comfrey tea', or by stacking dry leaves under a weight in a container with a hole in the base. When the leaves decompose a thick black comfrey concentrate is collected. This must be diluted at 15:1 before use.
- Comfrey as a mulch or side dressing - a two-inch layer of comfrey leaves placed around a crop will slowly break down and release plant nutrients; it is especially useful for crops that need extra potassium, such as fruit bearers but also reported to do well for potatoes. Comfrey can be slightly wilted before application optionally but either way, avoid using flowering stems as these can root.
- Comfrey potting mixture - originally devised to utilize peat, now environmental awareness has led to a leaf mold-based alternative being adopted instead; two year old, well decayed leaf mold should be used, this will absorb the nutrient-rich liquid released by the decaying comfrey. In a black plastic sack alternate 3-4 inch layers of leaf mold and chopped comfrey leaves. Add a littledolomitic limestone to slightly raise pH. Leave for between 2–5 months depending on the season, checking that it does not dry out or become too wet. The mixture is ready when the comfrey leaves have rotted and are no longer visible. Use as a general potting compost, although it is too strong for seedlings.

 In the school garden we prepared liquid comfrey fertilizer. We cut the leaves of the comfrey and stuffed them into a 'tea bag' that we left inside a container for two weeks. After those two weeks we took our the 'tea bag' and let the comfrey liquid in the container for future use.
Subscribe to:
Posts (Atom)