  |
|
Oxalis tuberosa - Oca
Planting a tree
To plant a tree we need to dig a hole three times the size of the pot of the tree.
Once the hole is digged we will untighten the roots of the tree so they do not go circular and they can grow properly.
We will put some water into the hole to see if it drains. If it does we put some compost on the bottom, if it does not drain we will place some pebbles or sand and then the compost.
We lay the roots on the hole and cover with soil avoiding to leave air in the middle.
We press the soil on the top and put some more compost over it.

|
 |
 |
 |
 |
 |
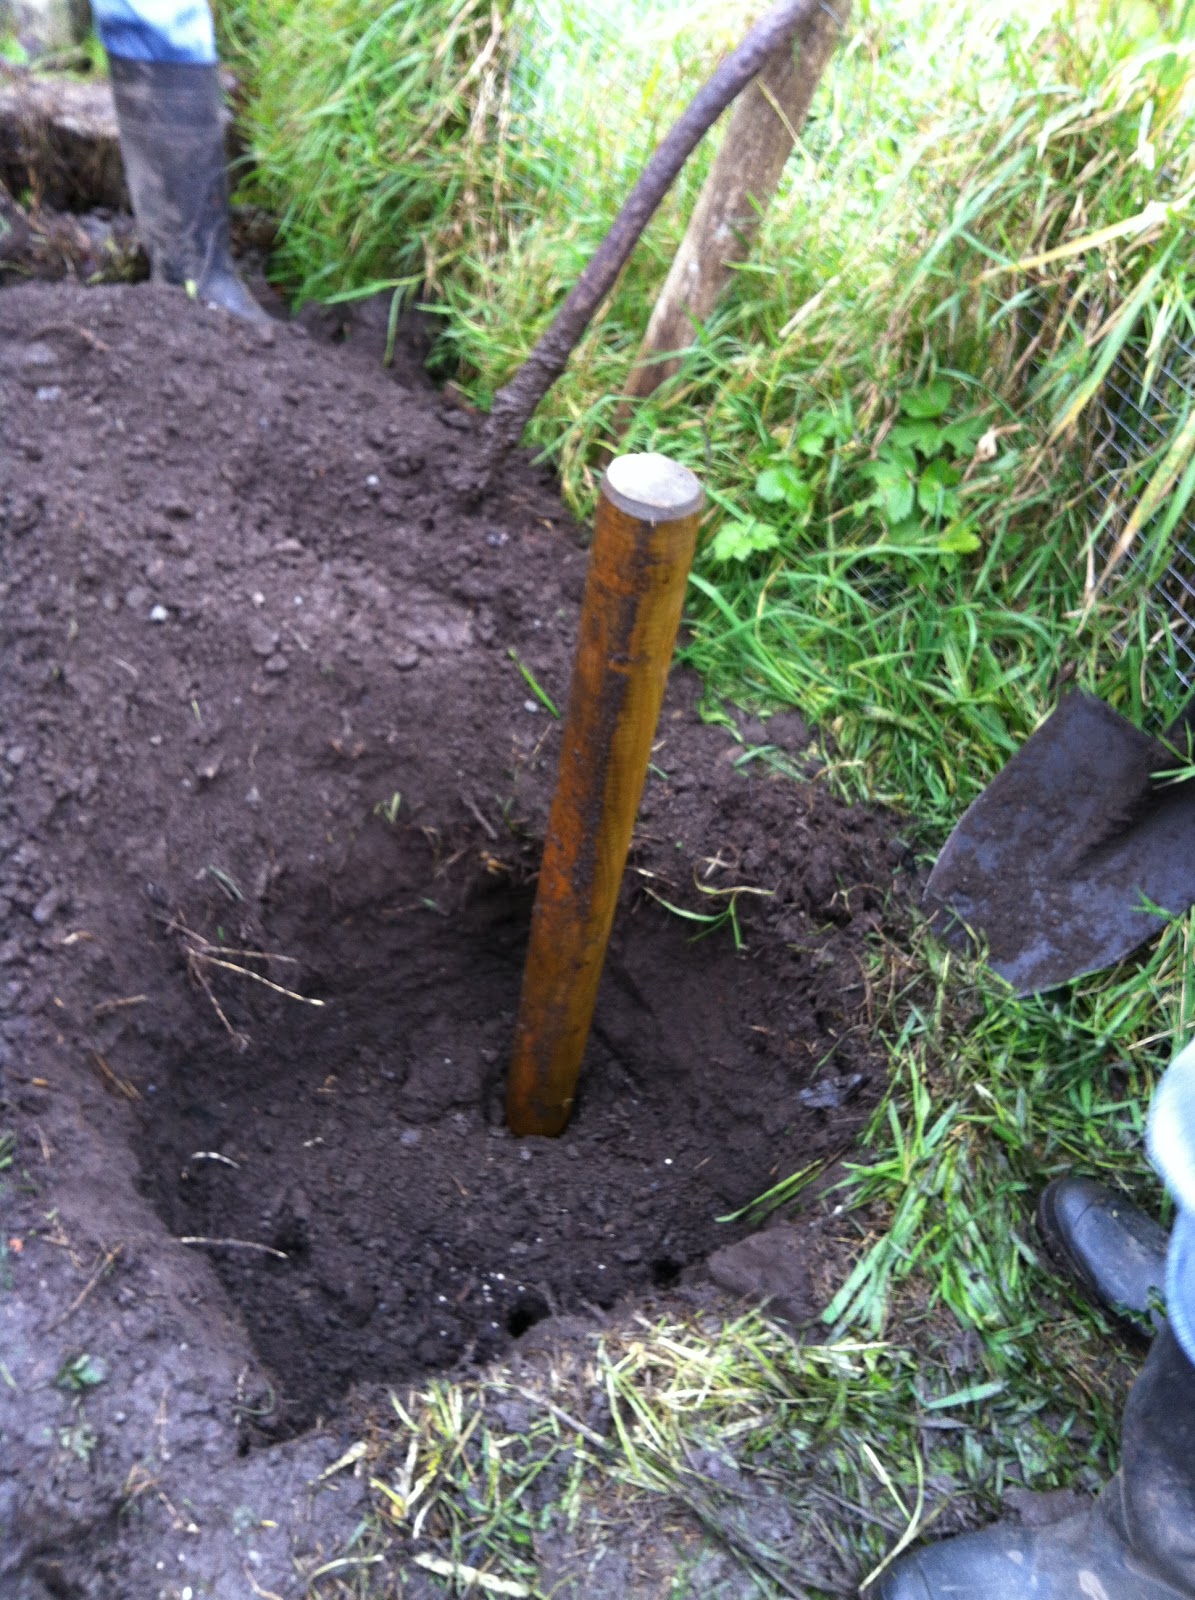
We can stake the tree to help it grow straight even if there are hard winds. We will place the stake on the side of the dominant wind, at a distance of 20cm of the tree and we will tie the stake to the tree with rubber cords to allow the tree to have flexibility when it gets the wind.
Never stake a tree longer than two years. Its root should develop properly to give enough strength to the tree to hold by its own roots.
Never stake a tree longer than two years. Its root should develop properly to give enough strength to the tree to hold by its own roots.
The tree we planted is a cherry tree.

Perlite

Perlite is an amorphous volcanic glass that has a relatively high water content, typically formed by the hydration of obsidian. It occurs naturally and has the unusual property of greatly expanding when heated sufficiently. It is an industrial mineral and a commercial product useful for its light weight after processing.
Perlite is a non-renewable resource. The world reserves of perlite are estimated at 700 million tonnes.
In horticulture, perlite can be used as a soil amendment or alone as a medium for hydroponics or for starting cuttings. When used as an amendment it has high permeability / low water retention and helps prevent soil compaction.
Perlite provides extremely efficient increase in aeration as a consequence of its high air filed pore space. It produces a well drained environment for root growth.
Vermiculate

Vermiculite encourages quicker germination and improved seedling growth. It absorbs nutrients preventing them from being washed out and then releases them to the plant root.
Vermiculite can be used in different ways:
- Soilless growing media: exfoliated vermiculite is combined with other materials such as peat or composted pine bark compost to produce soilless growing media for the professional horticulturalist and for the home gardener. These mixes promote faster root growth and gives quick anchorage to young roots. The mixture helps retain air, plant food and moisture, releasing them as the plant requires them. These mixes were pioneered by Boodley and Sheldrake
- Seed germination: either used alone or mixed with soil or peat, vermiculite is used to germinate seeds. Very little watering is required. When vermiculite is used alone, seedlings should be fed with a weak fertilizer solution when the first true leaves appear. A tablespoon of soluble fertilizer per one imperial gallon (3.78 : 1) of water is the recommended mix
- Storing bulbs and root crops: pour vermiculite around bulbs placed in container. If clumps are dug, allow to dry for a few hours in the sun and then place in cartons or bushel baskets and cover with vermiculite. The absorptive power of vermiculite acts as a regulator that prevents mildew and moisture fluctuation during the storage period. It will not absorb moisture from the inside of stored tubers, but it does take up free water from the outside, preventing storage rot.
- As a soil conditioner: Where the native soil is heavy or sticky, gentle mixing of vermiculite up to one-half the volume of the soil is recommended. This creates air channels and allows the soil mix to breathe. Mixing vermiculite in flower and vegetable gardens or in potted plants will provide the necessary air to maintain vigorous plant growth. Where soils are sandy, mixing of vermiculite into the soil will allow the soil to hold water and air needed for growth.

Planting cuttings
When we take cutting from a plant we should plant them in the next half an hour. We can put them in water till we work with them.
Before planting them we can deep the cutting into rooting compound first.
We will have to create the proper mix of soil to put into the pot. It should contain:
The cuttings should be in the pot at least for one year and then we can move it to another pot where they should be another year. After two years they can be moved to their final place.


Before planting them we can deep the cutting into rooting compound first.
We will have to create the proper mix of soil to put into the pot. It should contain:
- Soil
- Sand
- Compost
- Vermiculate or perlite
The cuttings should be in the pot at least for one year and then we can move it to another pot where they should be another year. After two years they can be moved to their final place.


Rooting compound
Synthetic plant hormones (PGR) are commonly used in a number of different techniques involving plant propagation from cuttings, grafting, micropropagation, and tissue culture.
The propagation of plants by cuttings of fully developed leaves, stems, or roots is performed by gardeners utilizing auxin as a rooting compound applied to the cut surface; the auxins are taken into the plant and promote root initiation. In grafting, auxin promotes callus tissue formation, which joins the surfaces of the graft together. In micropropagation, different PGRs are used to promote multiplication and then rooting of new plantlets. In the tissue-culturing of plant cells, PGRs are used to produce callus growth, multiplication, and rooting.
We can create our own rooting compound
Just as in humans, hormones stimulate various functions in plant growth. The first hormone discovered to cause root growth is called auxin, and the synthetic version of auxin is what we find in commercially sold compounds today.
The willow plant is a natural source of auxin. Therefore, it can be very easy to make up a fresh batch of homemade rooting compound whenever you need to plant some new cuttings.
Gather a handful of willow branch tips
- Chop or mash into smaller pieces
- Fill small container with pieces
- Fill container with water & allow to sit overnight
- Remove willow pieces
- Dip cutting into the water, covering the stem
- Put cutting into your potting mix (or moist sand)
- Cover with a plastic bag to retain moisture
- After roots form, re-pot
Also, don't get rid of the willow water when you're done with your cuttings. Save it to water your plants!
If you don't have access to willow, dissolve a few aspirins in a jar of water. Aspirin is made from willow bark, so it can have the same effect as the willow water.
Pruning a tree
 |
| Scar in the bark due to wrong pruning |
When we prune a tree we have to be careful not to make scars on the bark. If the pruning of a branch is done to close to the bark, it will leave a scar in the bark and the inner part of the trunk will be exposed to air, therefore to fungi and roteness.
When pruning a branch we should always leave at least 2-3 cm of the branch out of the trunk, so when the bark reabsorbes it, does not make any scar in the tree.
 |
| Proper pruning leaving 2-3cm of distance to the trunk |
 |
| How it should look after pruning |
 |
| Scar due to a too tight staking of the tree |
Other scars in the tree may be done by a bad staking. It we stake the tree too tight or with a hard material that is not rubber, the wind will make the string rub the bark and cause a scar like the one shown in the photo.
Subscribe to:
Comments (Atom)